
Character Skin Weighting
One of the key steps in making your character come to life
By Ethan Molgren - Character Modeler & Level Designer
A lot of effort is put into character design in any sort of art medium. To create a 3D character, artists must conceptualize it through concept art, create a model based on the concept, texture it, rig it, and then finalize the skin weights on the model before adding the controls. Now, that may seem like a lot, which it can be depending on the project, but all this effort is needed to create fun characters that can move properly when being animated.
At Skeletal Sync, we have been working diligently on our characters for Esquelito and wanted to give you a behind-the-scenes look at the process of skin weighting in 3D. To help give a good understanding, we need to look at the roots of 3D animation, which is rigging. Rigging is the process of adding joints to a character that simulate how the skeleton is structured in the model. You are basically creating the bones in your character, representing the different limbs and body parts it has. This process is foundational for most 3D animation artists to go through. Skin Weights, however, is where the magic happens because you are basically telling the 3D software you’re working in what bone moves what. In a way, if joints represent the bones of the model, skin weights represent the muscles surrounding the bone.
Skin Weighting doesn’t have one uniform way of being done; everyone has a different process that works for them. However, what they all have in common is the need to understand the muscles of your character and how they affect the rest of the body. My personal process in Maya is working with the Quick Rig tool using the step-by-step process. The quick Rig tool allows you to apply a humanoid rig to your character without having to create all the joints yourself. It’s not always accurate, so clean-up may need to be done. Generally, how clean up goes with the step-by-step process is moving the joints that were provided to the position you would like. Finalizing it would create the skeleton and apply it to the character. Once the rig is done for the character, Skin Weighting is all that’s left before your character is ready to go. With the created joints and the basic movement controls provided by the Quick Rig, you can move your character around and see if there are any problems. You may notice right away that moving some parts of the body, like a foot, may affect other parts of the body that are close to it. This is where the real challenge begins with Skin Weighting.
To clean these up, you need to work with the “paint skin weights tool.” This tool turns your character completely black and highlights the color white on parts of the model depending on the joint. Let's say you want to clean up the foot joint. You select the joint you want to work on, and it shows you what the joint affects in white. If there are parts of the model that are close to the foot, then the white may pool over to them. This is what causes your rig to move things that you don’t want. To fix this, choose a color to paint on your model, which is a gradient between black and white. Selecting black tells the program not to affect this part of the model, so all you have to do is paint over the white parts that you don’t want the movement to affect. There are some additional things you can do to make the model move more accurately, such as selecting a more gray color to create a smoother fade into different joints. It’s okay to keep everything black and white, but you may notice that some parts of the model would work better if it were more gray. Once you go through and clean up the whole model, it’ll be ready for you to start animating with!
We at Skeletal Sync appreciate your interest in our game and are excited to see you spread more joy in Esquelito!
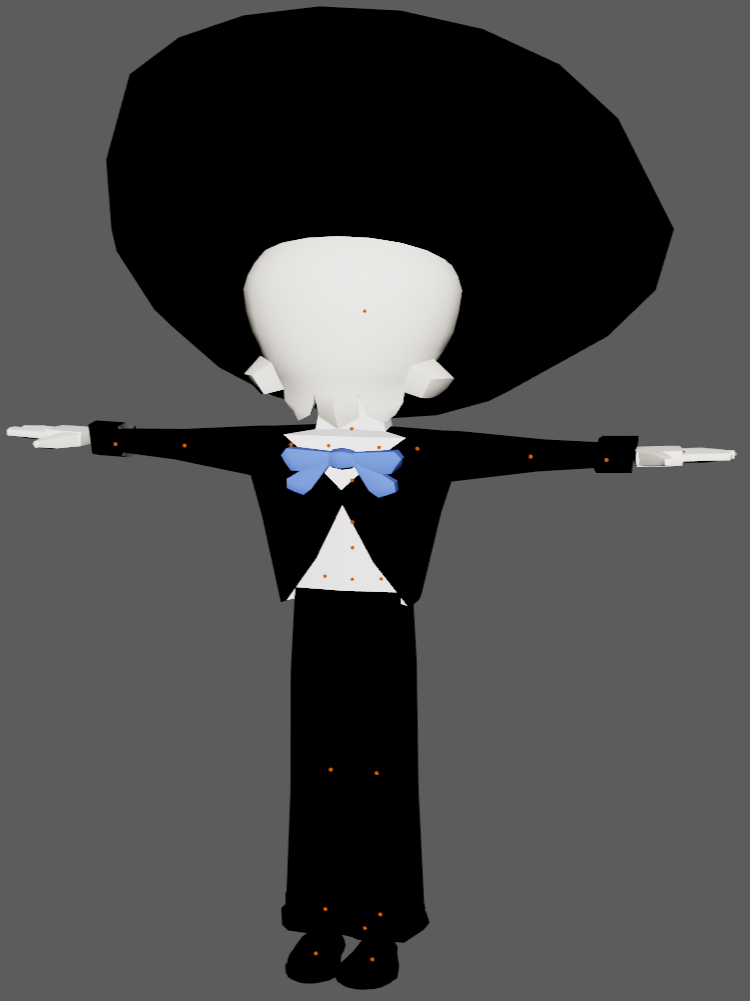
Model with editable joint points
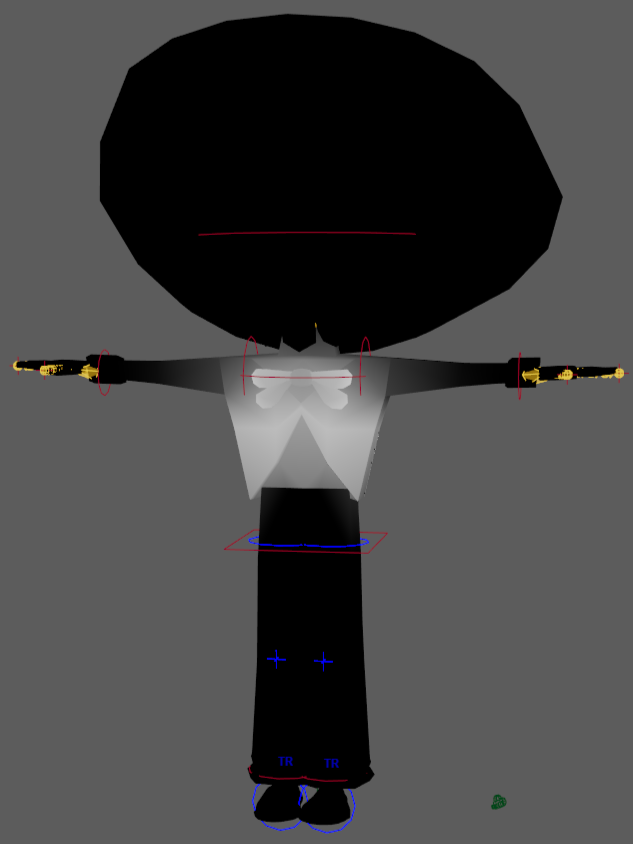
Chest skin weights